 MartinShields
Does restoring external stonework during a full renovation depend more on careful sequencing than on specialist materials? You’ll need both, but the order matters: inspect the masonry, trace the causes of damage, and coordinate repairs with roof, window, and drainage work. Choose compatible materials and gentle cleaning methods to avoid harming sound stone. A missed crack or poorly timed repair can undermine the whole project—so start by mapping the damage.
Key Takeaways
- Survey the exterior, map defects, photograph them with a scale, and compare findings with archival drawings.
- Coordinate stone repairs with roofing, flashing, drainage, and window work; repair exposed stone after demolition and heavy access.
- Use approved, compatible stone and mortar, testing samples in inconspicuous areas before full application.
- Clean gently, then repair cracks, joints, and missing stone; avoid abrasive tools, harsh chemicals, and moisture-trapping coatings.
- Keep drainage clear and inspect the stone at least twice yearly, recording changes and consulting a conservator when needed.
Inspect Stonework and Map the Damage
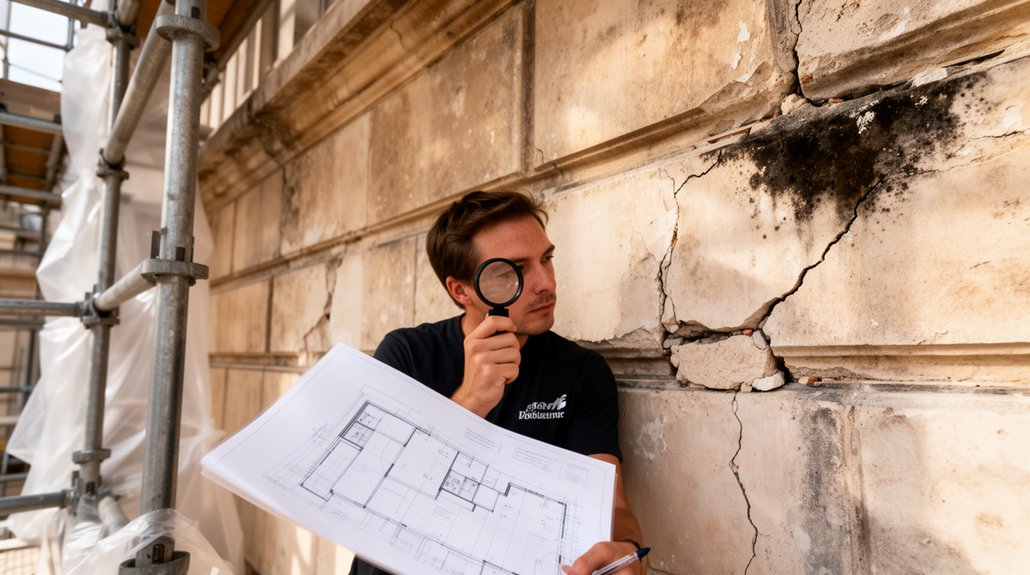
Before choosing a repair method, inspect the stonework closely and map each area of damage. Walk the full exterior, noting the location, size, and type of visible defects. Use a consistent numbering system to link each observation to a marked-up elevation or site plan. Photograph details from fixed viewpoints, and include a scale reference so you can compare conditions later.
Record the stone type, joint pattern, tooling, and any previous repairs. Note features that carry Historical significance, such as carved details, dated stones, or original masonry bonds. Consider aesthetic considerations when identifying mismatched patches, altered finishes, and uneven repointing.
Check your findings against archival drawings or conservation records, if available. Keep the map factual: describe what you see without assigning causes. This baseline helps you set priorities and brief specialists accurately.
Trace Cracks, Damp, and Stone Erosion
Trace each crack, damp patch, and area of erosion on your damage map, noting its length, direction, extent, and proximity to joints, openings, or drainage features. Photograph each defect with a scale for comparison, and repeat observations after rainfall to distinguish active water entry from old staining.
Check whether cracks widen, follow mortar joints, or cross individual stones; these patterns can indicate movement, failed pointing, or surface stress. Record damp boundaries, salt deposits, and biological growth, since each may reveal a different moisture source.
For erosion, note lost detail, softened edges, and exposed aggregate without scraping the surface. Consider the stone’s Historical significance and aesthetic considerations before judging damage: weathering may contribute to its character.
If causes remain unclear, seek a conservation specialist’s assessment before selecting treatment. Keep your records precise and dated.
Schedule Stone Repairs With Other Trades
Once you’ve documented the damage and likely moisture sources, coordinate stone repairs with any work that could affect the same wall. Set the sequence with your project manager, mason, roofer, window installer, and scaffold crew before anyone begins.
Complete roof, flashing, drainage, and window work first when it could introduce water or disturb repaired masonry. Schedule stonework after dusty demolition and heavy access work, but before final cleaning and finishes.
Confirm scaffold access, lifting plans, and protected storage so trades don’t damage completed repairs or block the mason’s work.
Share drawings, access dates, and repair boundaries with every contractor. Allow time for surveys, approvals, and Material sourcing, especially on listed buildings.
Keep Historical authenticity in view when planning interfaces, and record decisions so each trade understands its responsibilities. Review progress together and adjust dates promptly when conditions change.
Choose Compatible Stonework Repair Materials
Match replacement stone to the original’s composition, porosity, and finish so it weathers consistently.
Choose mortar with compatible strength and permeability; overly hard mortar can damage softer stone.
Test proposed materials on a small, inconspicuous area before proceeding.
Match Stone Composition
Before selecting a repair material, identify the stone’s composition and porosity, since incompatible mortar or replacement stone can trap moisture, stain the surface, or accelerate decay.
Examine sheltered and weathered areas, then compare color, grain, texture, and visible mineral inclusions. If the stone type isn’t obvious, ask a conservation specialist to assess samples or arrange laboratory testing.
Matching stone composition helps you choose replacement pieces that respond to moisture and temperature changes like the original. Source stone from the same quarry when possible; otherwise, select a verified equivalent with similar density, strength, and weathering behavior.
Check that its finish and dimensions suit the existing masonry, and test a sample in place before ordering.
Document your findings and selections to support historical accuracy and consistent repairs throughout the renovation.
Select Compatible Mortar
After identifying the stone’s composition and porosity, choose a mortar that works with—not against—the masonry. Match the mortar’s strength, permeability, and flexibility to the surrounding stone and existing joints.
For many historic buildings, a lime-based mortar suits softer, porous stone better than hard Portland cement, which can trap moisture and cause edge damage. Select an appropriate binder and aggregate, with grain size and color that complement the original work.
Don’t rely on appearance alone: a mortar that looks right may still be too dense or strong. Consider exposure, drainage, and joint width when specifying the mix.
If the building has Historical significance, consult conservation guidance and qualified masons; careful material choices support cultural preservation while protecting the stone.
Record the selected formulation and application requirements in the renovation specifications.
Test Material Compatibility
Even a well-chosen repair material can damage stone if it behaves differently under moisture and temperature changes. Before committing to a product, test it on a discreet area or a representative sample. Check how quickly the repair absorbs and releases water, whether it expands or shrinks, and how its color changes as it dries.
Compare hardness, texture, and vapor permeability with the surrounding stone; a repair that’s too dense can trap moisture and accelerate decay.
For historic façades, assess the test patch after several wet-and-dry cycles, not just immediately after application. Confirm that cleaning methods and finishes won’t stain or abrade adjacent surfaces.
If the work includes Stone carving, test the material in fine details to ensure it holds edges without obscuring profiles. Document results, and consult a conservation specialist when historical accuracy or uncertain stone composition demands expert review.
Clean Stone Without Damaging Its Surface
Use the gentlest cleaning method that removes the dirt without stripping the stone’s finish or eroding its surface. Start with a soft brush and clean water, then assess the result before choosing stronger cleaning techniques.
Work on a small, inconspicuous area first, and let it dry so you can check for discoloration, residue, or changes in texture.
If water alone isn’t sufficient, use a pH-neutral stone cleaner approved for the material you tested. Apply it as directed, rinse thoroughly with clean water, and avoid letting cleaner dry on the stone.
Don’t use wire brushes, abrasive pads, acids, or high-pressure washing; these can scar, etch, or loosen the surface.
Clean from the bottom upward to limit streaking, and control runoff around nearby materials.
Careful surface preservation starts with restraint: stop if the stone reacts unexpectedly.
Repair Cracks, Joints, and Missing Stone
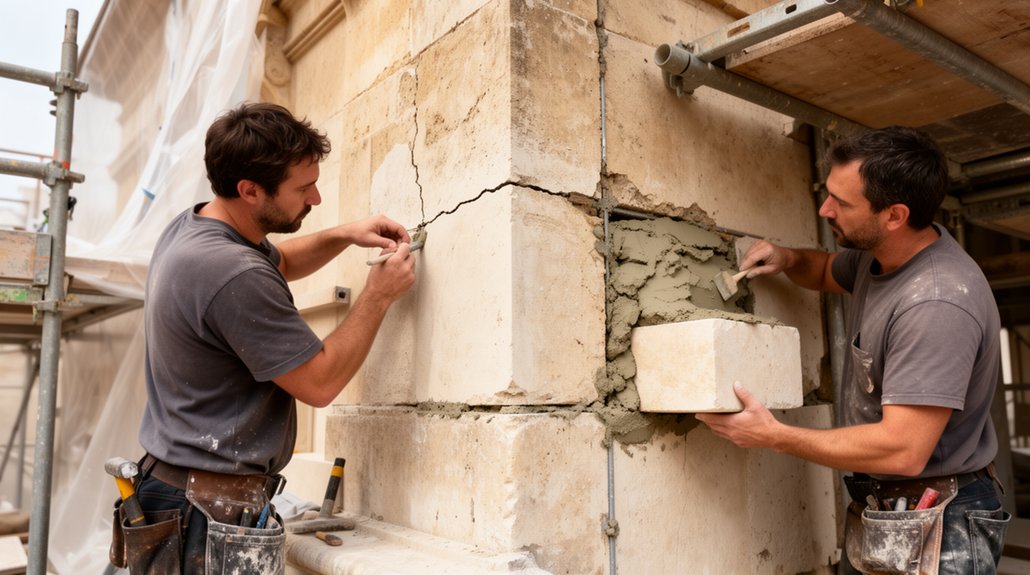
Once the stone is clean and dry, inspect cracks, joints, and gaps before making repairs. Note their locations, widths, and depth, and check whether movement or water caused the damage.
Remove loose mortar and debris with hand tools; don’t widen sound joints or use aggressive power tools.
Choose a compatible mortar based on the original’s composition, strength, color, and texture. A mix that’s too hard can damage softer stone.
For missing pieces, use matching stone where possible, shaping replacements to fit without forcing them into place.
Pack mortar firmly into joints and cracks, then tool it to match the existing profile. Keep repairs damp as they cure, following product guidance.
For Historical preservation and aesthetic consistency, test materials in an inconspicuous area and document repairs.
Don’t conceal active structural movement with surface patching.
Coordinate Stone Repairs With Roof and Window Work
Coordinate stone repairs with roof and window work so one trade doesn’t damage another’s finished work. Set the sequence before crews begin: complete roof removal and window extraction first, then assess exposed stone for damage.
Have roofers finish flashing and drainage details before masons close adjoining joints; otherwise, water may enter behind fresh repairs.
Schedule window installation after opening edges are sound, but before final pointing where the frame meets the masonry.
Assign one site lead to confirm dimensions, access, and handoffs daily.
If the project includes Stone carving or historical restoration, require the conservator and trades to approve samples, mortar, and fixing methods before work proceeds.
Document concealed conditions and changes so each crew works from current details. This coordination limits rework and keeps interfaces accurate.
Protect Restored Stonework for the Long Term
Protect restored stone with a breathable treatment suited to its type and condition; avoid coatings that trap moisture.
Keep gutters, downpipes, and joints clear so water drains away from the masonry.
Schedule regular inspections to spot cracks, leaks, or surface deterioration before damage spreads.
Apply Breathable Protective Treatments
After the stonework has fully dried, consider a breathable water repellent to reduce water absorption without trapping moisture inside the masonry. Choose a product specifically approved for your stone type, and test it on a small, inconspicuous area first. Check that the trial doesn’t darken the surface, create a sheen, or alter the texture.
Follow the manufacturer’s directions for application temperature, coverage, and drying time. Apply evenly with a low-pressure sprayer or brush, working from the top down and avoiding puddles.
Don’t coat damp, salt-contaminated, or actively deteriorating stone; address those conditions before treatment.
Use compatible sealing techniques that support historical accuracy, especially on heritage façades, and avoid film-forming coatings that block vapor movement.
Keep a record of the product and application date so you can assess performance and plan future inspections.
Maintain Effective Drainage
Even a breathable water repellent can’t compensate for poor drainage, so keep runoff from soaking restored stonework. Direct roof water into functioning gutters and downpipes, then discharge it safely away from walls and foundations. Clear outlets and confirm that joints don’t leak onto masonry.
Good Rainwater management also depends on ground levels. Maintain a gentle fall away from the building, and avoid paving that traps water against the stone. Where runoff collects, install suitable channels or drains, ensuring they won’t undermine foundations or retain moisture beside the wall.
Include Drainage planning in the renovation scope before completing external finishes. Coordinate downpipes, paving, landscaping, and drainage routes so each directs water away without splashing or staining restored surfaces. Choose compatible materials and preserve access to outlets.
Don’t seal blocked drains behind new work; provide clear discharge paths from roof to ground.
Schedule Regular Inspections
Schedule inspections at least twice a year and after severe storms to catch small problems before they damage restored stonework. Check walls, steps, sills, and joints for cracks, loose pieces, open mortar, staining, or new biological growth.
Pay particular attention to areas beneath gutters, around downspouts, and near ground level, where moisture often collects. Photograph defects and note their locations so you can track changes over time.
If you find damage, arrange repairs promptly using compatible stone and mortar; unsuitable materials can trap moisture or accelerate deterioration. Don’t pressure-wash fragile masonry or seal it without professional advice.
Ask a qualified conservator to assess significant movement, persistent dampness, or historic details. Regular checks support Historical preservation and aesthetic enhancement by keeping repairs discreet and the façade’s character intact.
Record each inspection and repair to guide future maintenance and protect your renovation investment.
Conclusion
Restore stonework with patience, not force. Map every crack, trace moisture to its source, and choose materials that suit the original stone. Time repairs around roofing, windows, and other trades so fresh work isn’t damaged before it cures. Clean gently, mend joints carefully, and keep water moving away from the façade. Then inspect the stone regularly. With thoughtful protection and steady maintenance, you’ll preserve more than a surface: you’ll keep the building’s character standing strong for years.